You'd be surprised to know how efficiently you can make your own soap in the comfort of your home. Soap making isn't a skill you need a degree to learn; by just getting the right information, how to make soap won't be an issue for you anymore.
Homemade soap is the new rave right now, and there are lots of soap recipes out there; but how effective are they? Soap-making is beyond mixing different oils and raw chemicals; the soap-making process involves the calculated mixing of different substances.
Can You Really Make Your Own Soap?
Making soap can be done by anyone, so yes, you can make your own soap mixture. Soap making recipes are everywhere, much like baking recipes; however, it feels more adventurous to make soaps at home.
What Are The Different Ways To Make Soap At Home?

Cold Process Soap
Cold processed soap can be a bit difficult to make but not impossible. It involves using lye (a caustic substance) and essential oils of your choice. When making soap using this process, you'll have to heat your essential oils in the soap pot until it gets to 100℉ ( you can make use of old pots as well). Pour in a sodium hydroxide lye (not drain cleaners) and blend the soap until it gets thick to trace. Once it has reached trace, you can combine fragrance oils, soap colorants, and additives and then pour them into a soap mold. The finished soap hardens after 24 hrs, so avoid touching it before then, and it takes extra few weeks for it to be fully cured enough for use.
When making cold process soaps, remember that it's not an easy and clean soapmaking process, and cleaning up might take hours. However, to be an experienced soap maker, you need to act like one. There are certain basic equipment you'll need to for a cold process soap;
-
Essential oil like coconut oil, castor oil, and olive oil
-
Soap molds (linen soap mold, silicone mold, or wooden soap mold)
-
Colorants (Natural colorants preferably)
-
Safety gear like safety goggles, long sleeves, and rubber gloves
-
Vegetable oils
-
Soap pots and lye water
The cold process of making soaps involves the saponification process, so you can use raw milk (goat milk). You can also use heavy additives because, naturally, the texture of the soap is already thick.
Be careful not to include vanilla products (vanilla pudding) when using this method because it contains alcohol and might give your soap a brownish color.
Pros of Cold Process Soap
-
You get to make your soap from scratch and have knowledge about all the ingredients used.
-
Allows you to get creative by trying out different fragrance oils or expensive oils of your choice.
-
It allows for fun ideas and lets you customize ingredients to your preference.
-
It's considered a more natural bar soap.
Cons of Cold Process Soap
-
You need to be extra careful when handling the lye because when exposed to your skin, it can cause damage.
-
It's a bit expensive, as you'll need to purchase some equipment.
-
You'll need to wait for a few weeks before you can use it.
-
It's usually made with 100% sodium hydroxide lye, which can harm the skin.
Hot Process Soap
Hot process soap making has a different soap recipe from the cold process. The hot process involves using external heat to get the finished soap to a gel phase. However, most people prefer the cold process soap because it has a more attractive look. Of course, it boils down to personal preference, but using the hot process gives a rustic design that cannot be manipulated.
Still, many people enjoy making soap with this method because you don't have to let the soap cure before use. You can make use of it the next day, but it's recommended to give it a longer curing time (48 hrs), especially if you are making bar soap.
How to make your own soap easily, especially with the hot process, involves measuring and preparing. When you have a prepared mold already, which is a mixture of liquid oils & solid oils, fragrances, distilled water, colorants and lye mixture, you have done more than half of the job.
After you have successfully made your mold, put your solid oils into a Crockpot/ double boiler, and set the temperature at low heat, or you can just use a slow cooker. Mix the lye while waiting for your oil mixture to melt.
Proceed to mix your lye and water. It's important to note that you should pour your lye inside the water, and not the other way round which is pouring water inside the lye, as this can cause a negative chemical reaction. Get your spoon ready and hand stir until the mixture is fully dissolved. This chemical reaction will release strong fumes when boiling, so be sure not to inhale them. We strongly suggest doing this in a very well ventilated area to avoid directly breathing in the fumes.
After mixing the lye solution, you can add the already melted solid oil and liquid oil to the double boiler and allow it to be completely melted before proceeding with the process.
Once your oils are heated to a right temperature of 130℉ and your lye water has cooled, you can mix both. You can use an immersion blender or stick blender to avoid the mixture splashing on your skin.
Keep stirring until you notice your soap has reached trace. You'll know when you batter reach trace because there'll be visible liquid air bubbles at the top of the mixture. Trace means when your soap has thickened to form a strong emulsion.
Now it's time to cook your soap, and when doing this, your soap might begin to bubble. You can allow it to bubble, but use a spoon to stir it down gently if it gets too much. While your soap is cooking, make sure to scrape all the sides of the double boiler so you don't get to lose soap. After a few minutes, your mixture will have a wax-like texture, which means it's time to take it off the cooker.
Now is the time to add your fragrances and color, but allow the mixture to cool down a bit so the fragrance doesn't disperse. Congratulations, you are done with the hard part, so it's time to store your soap. Get your prepared mold, put it in the soap batter, and leave undisturbed for 24hours.
If you're planning on being creative and adding any topping like lavender buds or sparkles, add them now! Decorations are much easier to manipulate when the batter is warm.
Pros of Hot Process Soap
-
The extra heat speeds up the saponification process, so you don't have to wait several weeks before use.
-
You can make this hot process soap using a double boiler or slow cooker.
-
Washing is easy because the soap in the double boiler is already soap. Just add water and rinse.
-
You get to fine-tune the ingredients and add other oils and any other ingredients you want.
Cons of Hot Process Soap
-
Unlike cold process soap, it's difficult to add natural products like goat's milk because it scorches during the cooking stage.
-
Its thick texture makes layering and swirling hard to do -- making it tough for even kids to prepare.
Re-batching Process

What happens when you flop using either the hot or cold process on your first attempt? Do you throw it all away? Or do you figure out how to make something useful out of the "flop" you created?
If yes, then you should consider the rebatch process. Now, the question is, how do you rebatch a badly made soap?
Cut your soap into tiny pieces; you can use a grater or a knife to do this -use a grater if the soap is already cured, and use a knife to cut it if it's still fresh and soft. Proceed to mix water or any other liquids of your choice. Using milk to melt the soap is a better option because it'll result in a smoother consistency. Wondering about what measurement of milk to use, "just use enough." You need to use enough liquid to melt the grated soap thoroughly. So your liquid measurement is dependent on how thick your bar soap is.
When you add excess water to the soap, it'll take longer to cure, so you might want to watch out for that. Get a crockpot, pour the grated soap, put in the liquid, and then stir gently. If the purpose of rebatching is because you forgot to put in oil or lye water, you should put it in now! Regardless of it being a rebatch process, handle lye with care so it doesn't spill on you.
Heat the mixture at a low temperature and let it cook for about an hour. Add your fragrance when the soap gets to a consistent texture that can be poured. Scoop your rebatched soap into the mold and leave it for 24hrs. Use a baking bag to rebatch the soap and place it inside hot water. When it becomes translucent, cut open the bag and pour the soap into the mold.
Pros of Rebatching Process
-
With this process, you can add delicate ingredients like herbs.
-
It helps you save batches of soaps that you'll otherwise throw away.
Cons of Rebatching Process
-
It's a very lengthy process.
-
Rebatched soaps doesn't always have a smooth and flawless look like melt and pour soaps.
Can You Make Soap At Home With All Natural Ingredients?

Yes, homemade soap can be done with only natural ingredients. Understandably, you're curious about how to make soap at home with all-natural ingredients, as store-bought soaps can come with heavy-duty plastic packaging that might contain harmful chemicals.
Homemade products are always the best because you aren't even certain of the ingredients included by online vendors who sell these traditional soaps.
Natural homemade soap isn't mixed with chemicals that might burn your skin or other unknown herbs.
Before starting with your all-natural soap, you need to find a natural soap base as well. You can make use of either of these three oils, avocado oil, coconut oil or castor oil. Alternatively, you can also use shea butter, cocoa butter, and glycerin.
You can add essential oils to any of your all-natural soap recipe, and you're good to go. For instance, you can add 30 drops of jojoba oil per pound of your preferred soap base. If you wish to use different essential oils, you should split the measurement of oils in half with a measuring cup.
Can You Make Soap Without Using Lye?
Of course, you can make soap without using sodium hydroxide lye, and that method is called the "melt and pour" process. To make the melt and pour soap is safe, convenient and easy to do, and you don't need chemistry knowledge for this wink
Handling lye is not necessary with this method because the base has already undergone the saponification process.
To start this process, you need to purchase unscented soaps from your local store, or you could also check thrift stores around your area.
Melt the soap using a double boiler microwave. When the first batch is fully melted, you can add fragrances (preferably one with a lighter scent), color and additives. Pour soap base into whatever mold you have (wooden molds or silicone molds), and allow it cool.
There are a few things you'll need for the melt and pour soap making;
-
Heat resistant bowl
-
Microwave or double boiler
-
A mold of your choice
-
Measuring cup
-
Additives, fragrances and color
After you have decided on your soap base, cut it into small portions for it to melt faster. Allow the melted mixture cool to 120℉, then pour in your additive, fragrance and color. Adding fragrance oils might cause the soap to have an oily texture, so do a patch test before mixing it with the entire soap. You can also put exfoliants in your soap as it helps add moisture to dull skin; an example of fine exfoliants include; oatmeal, coffee grounds and dried herbs like chamomile herbs. Adding clays to your mixture can also work fine in moisturizing the skin.
Pour the mixture into the soap mold and wait for it to harden completely before using. You can cut into the soap bar using a soap cutter, but if your mold is in single blocks, simply pop out the soap.
Melt and pour soap doesn't waste time in cooling down, and in a few seconds, it might be difficult for your extra ingredients to penetrate.
Pros of Melt and Pour Process
-
Working with lye solutions is not needed.
-
You don't need safety goggles or extreme safety warnings because you aren't working combining lye in your mixture.
-
The melt and pour process is perfect if you always worry about having a perfectly shaped soap; the final product is in clean and straight layers.
-
It's very cost-effective.
-
It requires very few ingredients.
Cons of Melt and Pour Process
-
This method offers limited creativity, and the base is not customizable.
-
You can't use fresh ingredients, as it'll eventually spoil the finished product.
-
Melt and pour soaps can burn skin when it's too hot.
-
A quality base will always have an advantage.
What Is The Easiest Way To Make Soap?

There's no one particular easy way on how to make soap; what may look easy for you may not be that easy for your friend or neighbor. That aside, depending on the type of soap you want to make, it could be liquid soaps, hard bar soaps, whatever it's; make sure your recipes are less hazardous.
Most soap makers believe the melt and pour process is the easiest, especially for beginners, because it doesn't involve mixing lye (a caustic salt).
However, let's look at a very basic process on how to make soap bars;
-
Add lye inside your measured water. Lye reacts harshly, so be careful.
-
Select your oils, and heat until it melts.
-
After it's melted, leave it to cool.
-
Put both the lye water and oil into an immersion blender and blend until it forms a soap batter.
-
This is the point where you can add any fragrance oil of your choice and colors
-
Pour the mixture into your mold and allow it to harden for 24 hours.
-
Turn it out of the mold, and use a soap cutter to cut it into small rectangular shapes.
-
Leave it on an old towel for 3 weeks to cure before using. Side tip; wear gloves when using this method.
When using oils for this method, you should know that certain oils have pros and cons. For example, coconut oil helps harden the bar soap, while olive oil doesn't provide a good lather, but it's a good agent for adding moisture to the skin. Shea butter helps nourish the skin, and castor oils provide good lather.
However, this method is a little tricky because it requires calculation, just like every chemical process. When you mix the lye with oils, saponification occurs. Still, the trick is that every oil has different properties and needs a specific amount of lye to be saponified, and that's where the lye calculator comes in.
Lye calculators help calculate how much lye each oil requires depending on your soap recipe. Without a lye calculator, you'll end up adding too much lye to your oils, ruining your soap making recipe. For this process, it's best to do it in open air or a place with an open window, so you don't inhale fumes. Also, always keep the remaining lye in a safe place, especially if you have kids.
Lastly, you'll need an accurate digital scale for making a balanced bar soap; and a candy thermometer for checking the temperature of the oils.
Don't fret when you don't get this right after your first few batches; no one became a pro soap maker in one day. We can't wait to hear you say, "my third or fourth batch turned out perfectly well."
-
Vanilla Fashion Bath Set Tote
 Vanilla Fashion Bath Set Tote
- Regular price
-
$72.99 - Regular price
-
- Sale price
-
$72.99
-
White Jasmine Fashion Bath Set Tote
 White Jasmine Fashion Bath Set Tote
- Regular price
-
$47.99 - Regular price
-
$72.99 - Sale price
-
$47.99
-
Lavender Spa Bathtub Set
 Lavender Spa Bathtub Set
- Regular price
-
$45.99 - Regular price
-
$44.99 - Sale price
-
$45.99
-
Lavender Fashion Bath Set Tote
 Lavender Fashion Bath Set Tote
- Regular price
-
$65.99 - Regular price
-
$0.00 - Sale price
-
$65.99


What Are The Ingredients And Equipment You Need To Make Homemade Soap?
Before you start your homemade soap making, you'll definitely need "soap making supplies" to make your soap mixture turn out well. Below we have a list of must-have equipment before you start your homemade soap;
-
Digital scale
-
Immersion blender or food processor
-
Thermometer
-
Container for mixing lye, and airtight container for lye solution
-
Mixing bowl for soap batter
-
Soap molds
-
Safety gear for skin and eye protection; goggles and gloves
-
Silicone spoon
DIY soap recipes vary but give a basic rundown of the soap ingredients you'll need for making soap at home.
-
One oil ( Vegetable oil or animal fats)
-
Essential oil (optional)
-
Distilled water
-
Dry lye
-
Colorants (optional)
How Do You Make Soap Step By Step?

How to make soap involves more than just using a few kitchen tools and lye. Let's walk you through a step by step process.
Select Your Recipes
As a beginner looking for an easy way on how to make soap, you'll first need to get a soap base. You can purchase an already made soap base that has glycerin, plant butters or fillers for its opaque texture. Alternatively, you can just get a translucent base, melt it, add in your preferred fragrance, then mold.
Lining Molds
This is just an extra tip in case you don't know how or why you should use lined soap molds. Without lining your molds, your soap will get stuck in whatever plastic or container you put it in. There are four materials you can use to line your molds;
-
Parchment paper
-
Waxed paper
-
Plastic wrap
-
Freezer paper
For whatever material you are using, ensure you wash it thoroughly. When using silicone molds, you don't need to use any lining material, so you can always opt for that if you don't want to go through the stress of lining.
Get All Your Tools Ready
You'd be surprised at how much easier your soap making process will be when you already have everything lined up. Get a heat resistant container for melting the base. Use an old loaf pan or pot, as they make the perfect containers for soap making. You should also get a quart canning jar to measure water and a pint jar to mix oils.
Gather every other important tool like; a hand mixer and lined soap mold or silicone molds.
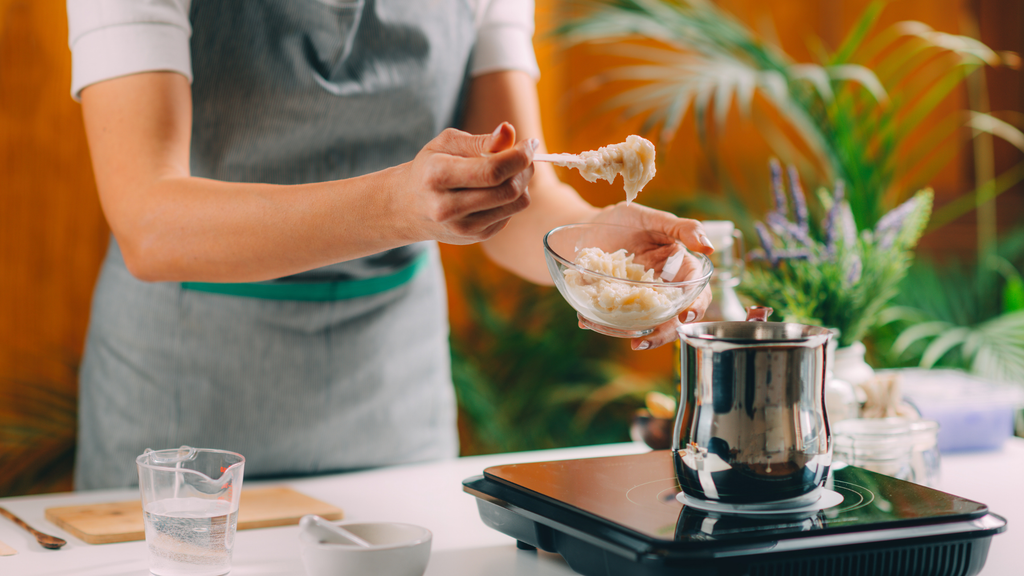
Heat and Melt The Base
Melting the base using a stove pot/double boiler gives you an advantage because you get to control how the base melts and prevent overheating. For this step, use heat-resistant gloves, so you don't hurt yourself. Make sure you don't stir while the base is melting because it can cause air bubbles to form. Allow the base to melt on its own from scratch.
Mix All The Lye and Oils
When your lye and oil mixture is at the right temperature, slowly pour the oil inside the mixing bowl ( do this step in your kitchen sink). Slowly add the lye and keep stirring until you have successfully mixed it completely.
While stirring, you'll notice a change in the color of the soap mixture, and as it thickens, that's a sign of it reaching trace.
Adding Natural Fragrance and Color
Now is the time to test your creativity. If you aren't following an exact recipe on how to make soap, you may need to do some trial and error before figuring out the exact amount of fragrance you'll always need. Adding one tbs of fragrance to a pound of soap is the general rule, but you can always watch video tutorials to get extra knowledge.
Add your fragrance, essential oils (coconut oil or olive oil), color, and every other addition you feel are necessary. Pour your soap mixture into the wax paper lined mold or silicone mold, and cover it with an old towel to prevent it from attracting dust. This process will also trap in the residual heat, so saponification can start.
Unmold and Slice Bars of Soap
Check on your soap 48 hours after being poured into the mold, and if it's still soft to the touch, leave it for extra 12 hours. When it becomes hard, turn it out on a baking rack and use a sharp knife to cut it into bars. Leave the soap for 4 weeks to cure completely before you can use it. When you use a half-cured soap, it'll dissolve faster than normal because not all the fatty acids have fully converted to soap crystals.
Safely Store Your Finished Product
When your soap is fully cured, you can wrap it up in paper towels and keep it in an airtight container. Homemade soap produces its own glycerin, thereby pulling moisture from the environment, so it's important to store it in a clean area and keep it tightly secured.
Conclusion

Making soap at the comfort of your home can be fun and creative, especially if you bring your kids into it. Once you've fully understood the soap-making process, you'll realize you've learned a really valuable skill.